Saturday, July 18, 2015

Mandarin jam glazed ham

Having always wanted to try to make glazed ham for Christmas, it was finally my chance. I had visions of marmalade, whisky and mustard flavours studded with cloves.


Researching recipes that had instructions to soak the ham with water, or add cider or guiness in the basting mix, wasn't really what I had in mind.

Pre-ordering my 6kg Kurabuta honey smoked leg ham from the local butcher meant that I didn't have to pick it up til the day before. As I recently re-sorted my spice stocks, I knew what I had in the pantry.


My glaze was going to consist of a jar of my homemade mandarin marmalade, a good dose of brown sugar for caramelisation dosed with ginger and mustard. Fingers crossed, I hoped that the glaze would work out. The baking smells of ham, marmalade and cloves are irresistible. Watching the fat rendering, separating into the diamond shapes highlighting the clove centres, this was going to be one good looking ham.

With time up my sleeve, I covered the bone part of my ham with a white napkin wrapped in a green ribbon and a bouquet garni of freshly picked rosemary and thyme to finish the dish.

Not only did it look good but it tasted amazing. Can't wait to have another go at this at the end of the year.


Based on weight of 6kg, 18-22 serves

Ingredients


250g (1 cup) mandarin marmalade
5 tbs brown sugar
1.5 tbs mustard powder
1 tbs ginger powder
6kg Kurobuta easy carve smoked leg ham (bone is removed for easy carving)
cloves to decorate

Method      


Prep the ham
1. Use a small sharp knife to cut around the rind, about 5cm from the end where the bone is.

2. Run a knife under the rind, around the edge of the ham.

3. Gently lift rind off in one piece by running your fingers between the rind and the fat.

4. Score the fat, (in our case there wasn't that much fat, so it was a 0.5cm deep), in a diamond pattern, taking care not to cut into the meat.


5. Place a single clove at the centre of the diamond pattern (this will also help the fat lifting away from the ham)

6. Preheat oven to 200°C (400°F).
 
7. Place the marmalade, mustard, sugar, ginger in a bowl and whisk to combine.
 
8. Baste the ham every 10 minutes for 35-40mins or until the ham is golden and caramelised.


Handy Hints
Freeze left over ham and ham bone for soups. Label, date and freeze for up to one month. When ready to use thaw in fridge overnight.

Leftover ham is fantastic for breakfast or supper. My sourdough bread was perfect for the job with pickled onions, avocado. 


Guide to ham weights

3kg - 10-14 serves
4kg - 12-16 serves
5kg - 15-20 serves
6kg - 18-22 serves
7kg - 20-25 serves
8kg - 23-27 serves

Saturday, July 11, 2015

Basque burnt cheesecake

Researching our next trip to the Basque region, I came across a recipe for a Basque burnt cheesecake. In readiness for our trip to San Sebastian and the food to eat, I was excited to learn that this is a place where you have to eat dessert first.

Not due to the fact that this is a Basque tradition but if we were to fill ourselves on savoury tapas, all this delicious cheesecake from the cafes will be gone. 

This must be the easiest cheesecake to make and equally delicious. I'll be sure to make a trip to the cafes in San Sebastián to get my fill of this cheesecake. 

And yes dear sister, it's meant to be burnt as the sugars form a delicious crust  which I can't get enough of. Will make it for you soon. 


Ingredients


600g cream cheese
4 eggs
275g caster sugar
300mL thickened cream
1 tbs plain flour 

Method


1. Preheat the oven to 200 degrees Celcius. 

2. Grease and line the bass and sides of a 23cm springform cake pan with baking paper so the paper comes 2cm above the rim of the pan. 

3. Beat the cream cheese using electric beaters until smooth and creamy. 

4. Add the eggs, 1 at a time, beating well after each addition. 

5. Gradually beat in the sugar, then the cream, then add the flour and beat until smooth. 

6. Pour the cheesecake batter into the prepared pan and tap the pan gently on a flat surface to remove any air bubbles. 

7. Bake for 50mins or until the top is dark brown and cake is set with a slight wobble in the centre and a skewer inserted into the centre comes out clean. 

8. Remove from the oven and leave to cool completely before removing from the  pan. 

9. The cake is best eaten within a few hours of baking. (Actually is still really good til the next day). 


Handy hints

The recipe did ask for double cream (fat content of 48%) as it is the most versatile cream because it withstands boiling and whips and freezes well.

But I opted for the thickened cream (fat content of 35%) which does an equally good job for this cheesecake and for whipping into cream.


Saturday, July 4, 2015

Fiery chicken, dakgalbi

This dish, dakgalbi, has always been something I wanted to make but my recent memories of this dish is a sweet potato, cabbage stew that my mother makes. This chicken dish is marinated then cooked with plenty of vegetables and was once a favourite of mine.

It was time to face my fears and see if it was a good dish to keep in my cooking repertoire. Traditionally the dish is made with sweet potato but I replaced this with white radish as it soaks up the delicious sauce. As I didn't have any cabbage in the fridge, I opted with moon buk, a dwarfed variety of buk choy instead. I can happily say that this is one fiery dish that tastes even better the next day. With the cold winter upon us, this dish will hit the spot.


Ingredients


1kg of chicken wings
1 carrot thinly sliced
1 onion thinly sliced
100g long white radish thinly sliced
2 leaves of cabbage* roughly chopped

Marinade
200mL water
3 tbs Korean chilli paste (gochujung)
2 tbs of rice malt syrup
2 tbs soy sauce
2 tbs crushed garlic
2 tbs cooking wine
1 tbs grated ginger
1 tbs curry powder (optional)**
2 tsp Korean chilli powder
1 tsp sesame oil
1 tsp sesame seed
pinch black pepper

Method 


1. Place all the marinade ingredients together.

2. Place chicken into the marinade mix for 1 hour.

3. Thinly slice carrots, onions, radish and cabbage

4. Place the marinated chicken mix into a heavy cast iron pot and bring to boil. Bring to simmer for an hour.

5. With a half hour to go on the cooking, throw in the cut up vegetables.

6. Serve with steamed greens and rice.


Handy hints
*Bunch of moon buk roughly chopped
**I've used a mild korma curry mix or you can make up a curry mix using
1 tsp ground cumin
1 tsp ground coriander
1 tsp dried chilli flakes
1 tsp ground turmeric
1 tsp ground black pepper


Thursday, July 2, 2015

Pork slider with kimchi

The flavours and textures used in Korean food are popping up all over the place, from exciting new restaurants like Moon Park to funky fusion diners like Ms.Gs. With celebrity chefs such as David Chang and Akira Back leading the charge, Korean food is being dabbled with by other hugely successful identities in the dining scene.  As a result, Korean food is developing a real familiarity with Sydney palates. 
I love that Korean food has finally received recognition and has become mainstream to being served in burgers and not just served as a side dish. As my tastebuds have changed over time, I usually detest very fermented kimchi. Only now I've started to appreciate the complexity of the flavours and have finally begun to understand what my parents have been telling me all this time.

Ever wondered how to make that pork slider, with the tender shredded meat and crackling, then don't venture too far. I found that this dish impressed the friends and family the most, and is so easy to do as the oven does most of the work.

When we served this dish to my brother in law, his response was annoyance that we hadn't served this up to him earlier at our get togethers and loved it so much, it was summed up as, "winner, winner, pork slider dinner".

 
Ingredients

1.5 kg pork belly
1 onion roughly sliced
1 tsp of Chinese Five Spice
1 tsp salt
3 bay leaves
400mL oil (olive oil and rice bran is what I typically use)

To serve
hot sirachi sauce
1/2 cup of mayonnaise
1/2 cup of kimchi
handful of coriander leaves
12 soft white burger buns

Method

 
1. Place pork skin side on a wire rack over the sink.
 

2. Boil a kettle of water and pour over the pork skin.

3. Using absorbent paper, pat the pork dry.

4. Place in a tray and leave in the fridge overnight to air dry. (Steps 2-4 are to help give that crispy crackling but these can be skipped, as I've stated in the handy hints section)

5. Next day preheat the oven to 160C.

6. Rub the pork with salt and 5 spice.

7. Find a tray deep enough to add onion, bay leaves, garlic, oil and pork and cover tightly with foil.

8. Place in the oven and cook for 4 hours or until meat is soft.

9. Drain pork from oil. Remove the meat and return the skin to the grill.

10. Turn the grill on and return the pork belly to crisp up the skin. Make sure you keep an eye on this as you don't want it to burn.

11. Allow the meat to cool before shredding.

12. I also like to refresh the buns to give it a nice crunch on the outside and the contrast of the soft inside. Heat the oven to 180C and leave the buns in for 8mins.

13. To assemble, dollop mayonnaise and chilli sauce on one side of the bun.


14. Add a small amount of kimchi, coriander and a generous heap of pork belly and small pice of crackling. Sandwich and secure in place with a toothpick.

Handy hint
You don't have to wait a day to start this recipe, as soon as you have poured the boiling hot water over the pork and dried this. Add the spices and oil and place into the oven.

If the crackling doesn't work as well, a great trick is to cut off the areas that it didn't work well for and place under the grill and crank the heat up and watch it closely. 


Monday, June 22, 2015

Decadent Chocolate Fondants

I haven't forgotten you all and I've been on adventures to Taiwan and Hong Kong which I will need to fill you in at another time but I needed to stop and write a recipe for my decadent chocolate fondants.

I recently ate at Big Stone Tapas in North Sydney and I couldn't get over how amazing the chocolate fondant dessert was. It was one of the things I missed most on my travels was being able to cook and bake for my family.

I decided to rectify this to replicate a quick and easy chocolate fondant that could be whipped up whilst we enjoyed our family dinner of spaghetti bolognese.


Serves 6

Ingredients


100g dark chocolate
100g unsalted butter

2 eggs
2 egg yolks
100g sugar

100g plain flour


Method


1. Preheat the oven to 150 degrees Celcius

2. Use a thin slice of butter and use this to grease the ramekins. (I use a pannacotta mould as I wanted these to be small as these were rather decadent)

3. Add chocolate and butter into a microwave dish with lid and place in the microwave for High 50 seconds. The chocolate wouldn't have completely melted but stir this mixture around and it will melt due to the residue heat from the butter.

4. Add eggs and egg yolks with the sugar into a mixing bowl and whisk for 3 minutes until pale yellow in colour.

5. Add the chocolate mixture to the egg mix and fold in the 100g of flour.

6. Divide the mixture into the ramekins and place on an oven tray.


7. Bake for 8-10 mins or until the surface is cooked but still soft in the centre.

8. I like to serve mine with a dollop of yoghurt as it is a rather rich dessert.

Sunday, June 21, 2015

Spaghetti Bolognese you want to make a big batch of.

I've been looking for a Bolognese sauce to impress hubby and have been playing around with a few things but I will say that I am most impressed with Matt Preston's Simple Bolognese recipe. So much so that I have made this twice already and haven't had the need to change the quantities and now have an easy method to make this. This recipe makes a good amount, as I have 3 containers in the freezer ready for the next spag bol night. Perfect for a cold winter's night and one that hubby and the kids' love.


Matt's simple bolognese

Serves 4-6

Preparation time: 15 minutes

Cooking time: 30 minutes or as long as possible

Ingredients

Olive oil
40g butter

To make soffritto
2 medium carrots, diced small
3 medium brown onions, diced small
4 bacon rashers cut into fingernail size tiles
2 celery sticks, diced small

1 tbsp soft brown sugar
4 cloves garlic, peeled, chopped and crushed
3 tbsp tomato paste

1kg beef mince
1 lemon
500ml red wine
3 bay leaves
Splash Worcestershire sauce
2 cans tinned tomatoes
500ml beef stock

1 large pack of egg tagliatelle  the curly nesty ones are nicest
150g Italian parmesan cheese
1 loaf crusty bread and a green salad for serving

Method


1. Place a large pot on the heat.

2.  Throw the onions, carrots, celery, bacon rashers into the food processor and blitz until diced small.

3. Pour in 2 tablespoons of olive oil and 40g butter into the hot pan. When the butter is melted and the oil hot, throw in the carrots, onion, celery and bacon. Cook until veg is soft and going translucent at the edges (about 10mins).

4. Sprinkle over 1 tbsp of brown sugar and stir through.

5. Add garlic and tomato paste. Move this all round the pan to cook out for three minutes.
Scrape the tomatoey soffritto into a bowl.

6. Splash in some more olive oil.  When it is hot, throw in the mince and cook until browned. Stir the meat the whole time so it cooks evenly. (Depending on the size of your pot, you may find it easier to do this in two batches.)

7. Cut a 4cm long ribbon of lemon peel (without pith) and cut the lemon in half.

8. Scrape meat into the soffritto bowl.

9. Turn up the heat and deglaze using the red wine.

10. When the wine has reduced by half, add back in meat, soffritto, bay leaves, a couple of good dashes of Worcestershire sauce, lemon peel, tomatoes and stock. Stir.

11. Season with salt and a good squeeze of lemon juice from one half of the lemon. Reserve the rest.

12. Bring to the boil covered, then remove lid and turn the heat right down. Cook very gently for up to four hours. Stir occasionally to ensure the sauce doesn't stick and burn. (If the sauce gets too thick, add some more stock and stir it in.)

13. The sauce is ready when it smells irresistible, wonderfully thick, and is a dark red, glossy colour.


14. Taste and season with a little more salt and lemon juice as required. You can now either serve it straight away or cool it and refrigerate before using the next day.

15. Cook the tagliatelle in plenty of salted boiling water in a large pan. When the pasta is cooked but still a little firm to the bite, carefully scoop out a cup of the starchy cooking liquid and drain the pasta.

16. Put a generous ladle of the bolognese sauce in the pasta pot (about two cups) and toss through the pasta. Moisten the combination with a little of the reserved pasta water so it isn't clumpy.

17. Feel free to use as little or as much sauce as you like  we've got lots of plans for the sauce that's left over.

18. Serve it with grated parmesan over the tagliatelle, bread for mopping up the leftover sauce and crisp green salad.


Wednesday, May 20, 2015

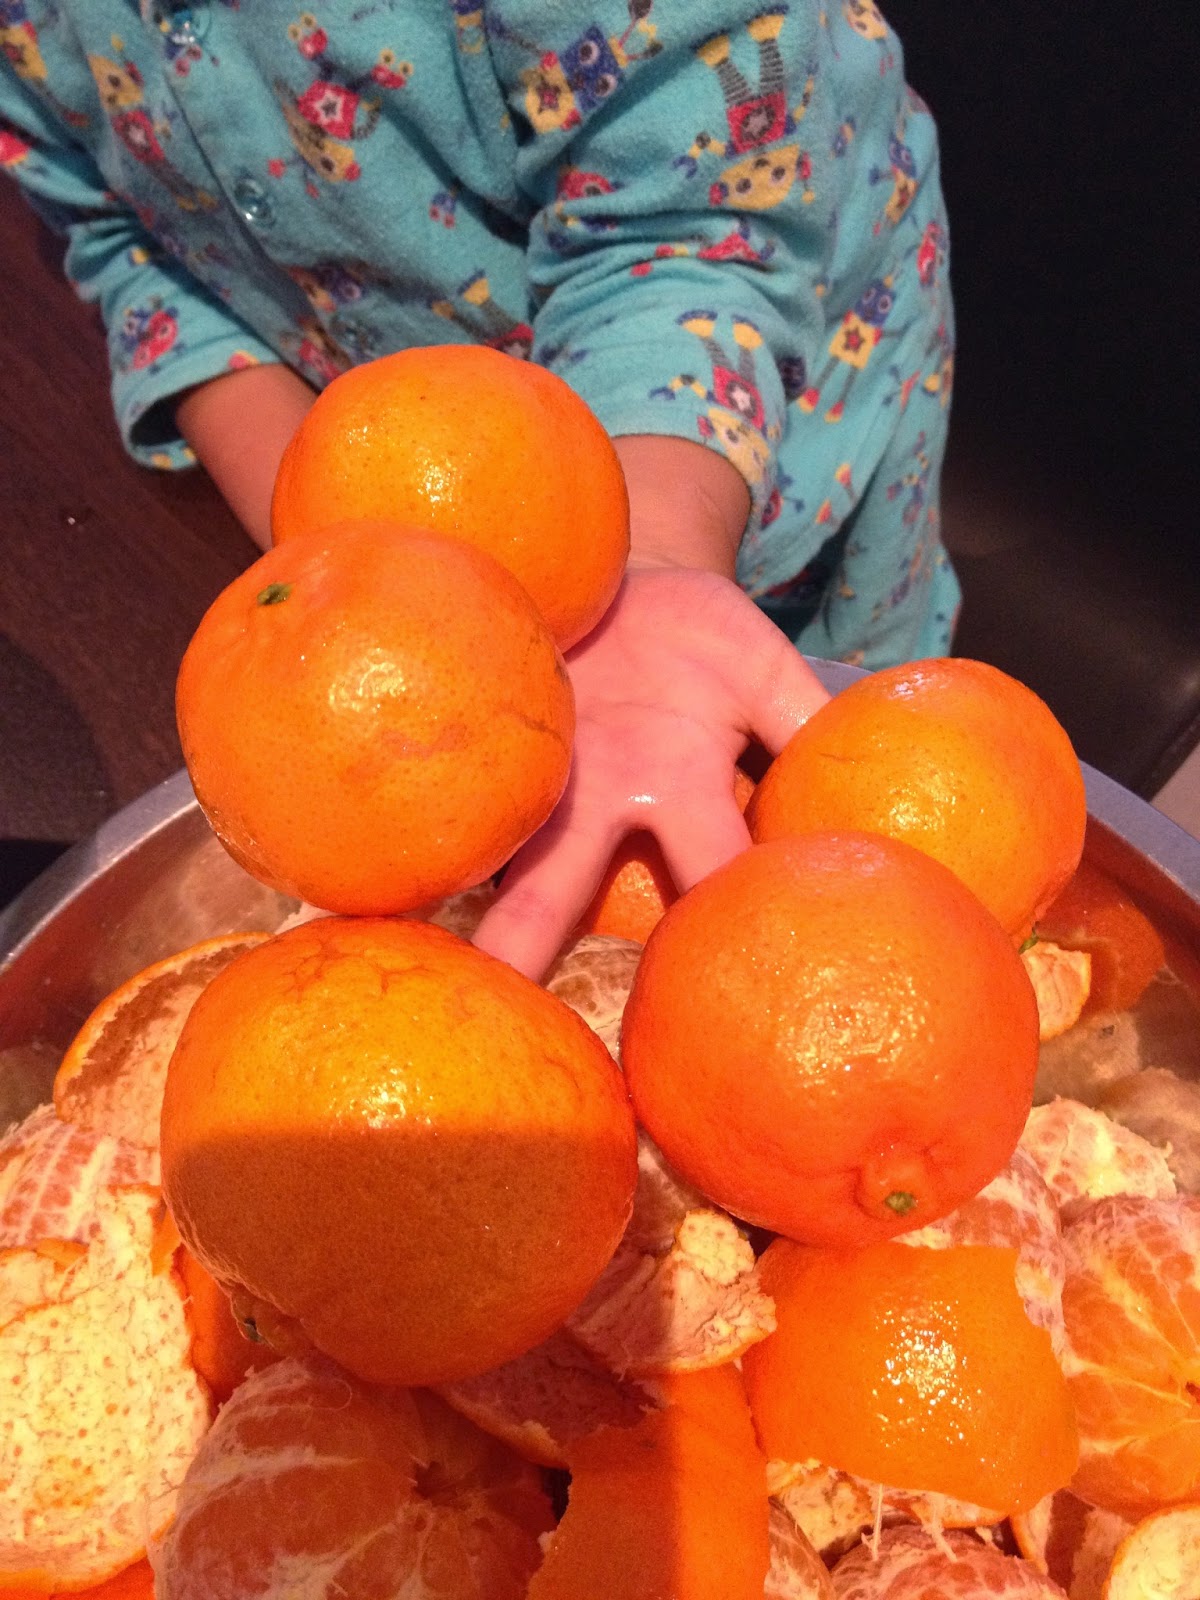
Mandarin marmalade

It's coming into mandarin picking season and I love how sweet and juicy this fruit is. When using this fruit to make marmalade, I tend to use less sugar, to let the sweetness of the mandarin do the talking.

A foodie friend had gifted me a box of mandarins from her farm on the provision that I provide a jar of my homemade mandarin marmalade. When she tasted it, she told me that I had missed my calling, such a compliment and wanted a copy of the recipe. I am a fan of marmalade, especially the citrus variety. I think that the slight bitterness from the rind and sweet flesh of the citrus is what makes it.  I find making marmalade theraputic and great little gifts to give to friends and family.

Marmalade is very easy to make as long as you get the ratio of citrus and sugar right. Or it is really up to you if you like a runny or thick marmalade. This is my trusty recipe that uses every single part of the mandarin including the pips and the pith (the white bit).

Why do I keep the pips and pith you ask, this is where the naturally occurring soluble, gum-like substance known as pectin is and pectin is what you need for the marmalade to set.

The degree to which a preserve sets is dependent upon the ratio between the fruit pectin, acid and sugar. And the levels of pectin and acid varies considerably between different types of fruits.

Getting slightly scientific on you, oranges and mandarins have high levels of pectin and medium acid levels, hence you're able to reduce the sugar content.

If you have friends that love to take all the pith off their mandarins, I recommend that you call them to come over right away to help you with your preparation. Removing the seeds and pith takes a awhile, so settle in with some tunes or get the kids to help. Don't you worry if you miss a couple of seeds, you'll find that these will just float to the surface so they can be easily scooped out.


Makes 5 x 375mL, 2 x 200mL jars full

Ingredients


20 mandarins (2.5kg)
1kg sugar (I tend to start from 0.75kg and taste til I'm happy with the sweetness but no more than 1.5kg)
6 cups of water
Juice of 1 lemon

Method


1. Peel mandarins and place segments into a large bowl. Keep the peel from at least 10 mandarins

2. Cut the peel into thin strips, (thinner is better, unless you like chunks of peel) and set aside. I tend to place 3 layers of peel of the same size and use a sharp knife to slice these at the same time.

3. Remove as much of the pith as possible and set aside in another bowl.

4. Cut a thin strip from the top of the mandarins with a knife for easier removal of the seeds. Place the seeds into the bowl with the pith.

5. Using a muslin cloth wrap the seeds and pith together and tie tightly with piece of cotton twine (used for cooking).

6. Add mandarins, peel, the parcel of pith and seeds, lemon juice, sugar, water into a large pot (something that is going to hold 2.5L at least).

7. Make sure you have a long wooden spoon as this will give you some distance from the bubbling sweetness and stir constantly over medium heat until sugar is dissolved.

8. Bring to the boil, then reduce heat down to medium and let it bubble away for about 1.5 hours, stir occasionally until setting point is reached.

How to test your setting point?
Put a plate in the freezer and chill it. Take it out when ready to test, add a dollop of marmalade onto plate. Let it stand for a 30 seconds. Then draw a line through the jam with your finger, if the line disappears, its means the jam is still runny, so keep boiling the mixture for another 5-10 minutes and test again. When the you draw a line through the jam and the line remains, your marmalade is ready for bottling.

9. Once ready, remove the parcel and discard the pith and seeds.

10. Pour the marmalade into hot sterilised jars.

11. Seal when the jars are cool enough to handle which is about 10mins later.

How to sterilise jars?
This is when the baby bottle steriliser comes in handy. Or if you don't have this preheat oven to 160C. Wash jar with soapy water, rinse and shake well, place the jars on a baking tray and put in the oven. Leave jars for at least 20 minutes. If you time it well, you'll just need to take the jars out of the oven when your marmalade is ready. Seal the jar when is cool enough to handle.

Handy hints

You can mix up the marmalade by adding Cointreau, whisky, brandy for an adults only version of mandarin marmalade.