Showing posts with label kids' meals. Show all posts

Saturday, July 24, 2021

Seb's very meaty meat and mushroom pie!


It seems to be all doom and gloom with the extended lockdown in NSW since Term 2 school holidays. 

So to mix things up a bit, I thought it would be a good idea for the kids to provide one savoury and one sweet dish each week to give their Mama a break from cooking duties. 

Throwing them a few food magazines to get their creative minds working, Seb decided he wanted to make a meat pie, this child of mine is quite a carnivore and loves spice.

With our fortnightly Your Food Collective food box delivery, it's always a fun surprise to see what delicious seasonal produce is provided, so that was our starting point. We also love the meat provided by these ladies, and I can't go past that delicious bacon.

So with gravy beef, osso bucco, mushrooms, beans in this week's delivery, Seb's pie was on the menu for this family.

 Thanks Jamie for kicking me into gear to post this pie recipe.


Ingredients

Meat filling

Vegetable Filling

Herbs

Liquids

Baking

1kg of gravy steak


500g osso bucco


1 tsp black pepper


Season well with salt


2 onions finely diced

2 garlic cloves chopped finely


Season with salt


2 star anise

1 cinnamon stick

2 bay leaves

2 tbsp tomato paste


A good two shakes of worcestershire sauce

200mL red wine

1 stock cube and 3 cups of water (or 3 cups beef stock)


Juice of ½ lemon

2 sheets of puff pastry thawed


2 sheets of short crust thawed


1 cup of cornflour 


2 celery sticks cut finely


500g mushrooms cut in half


2 carrots, rough chopped


1 sprig of rosemary, remove stalk and cut leaves finely


Olive oil


Baking ceramic beads


1 egg lightly beaten to glue the short crust and puff pastry/ and brushing on top


1.       Cut up gravy steak into 2-3cm bite size pieces. Leave osso bucco as is. Season the beef with generous amount of salt and black pepper. Then toss beef pieces and osso bucco in the corn flour.

2.       Heat 2 tablespoon of olive oil in a large saucepan over high heat. Shake off the excess cornflour from the beef and add to the saucepan. Do this in batches, so you don’t overcrowd the pan and the sear the beef all over for 3 mins til the meat gets this lovely golden brown burnish all over. Transfer beef to a plate once this is done.

3.       Use the same pan, add 2 tablespoon of olive oil and add onions and season with salt and add fine chopped rosemary leaves. Once onions have softened, about 4 mins, add garlic and cook for a further minute until fragrant. Transfer to a bowl once this is done.

4.       Using the same pan, add 1 tablespoon of olive oil, add carrots, celery to fry for about 2mins.

5.       Add the onions back in.  Then add the tomato paste, star anise, cinnamon stick, bay leaves, 200mL red wine, Worcestershire sauce, and golden brown beef pieces. Then add the stock if using or stock cube and 3 cups of water and lemon juice. Cover and, turn the heat to low and simmer gently for 2 hours. Don’t forget to stir every 10- 20 mins or so (as you don’t want the mixture sticking to the bottom).

6.       After 2 hours, the mixture will be like a thick gravy consistency, the meat will be tender, the osso bucco will have fallen off the bone. Remove bone, add bone marrow into the meat mixture and break up osso bucco meat. Remove star anise, cinnamon stick and bay leaves as well. Allow mixture to cool.
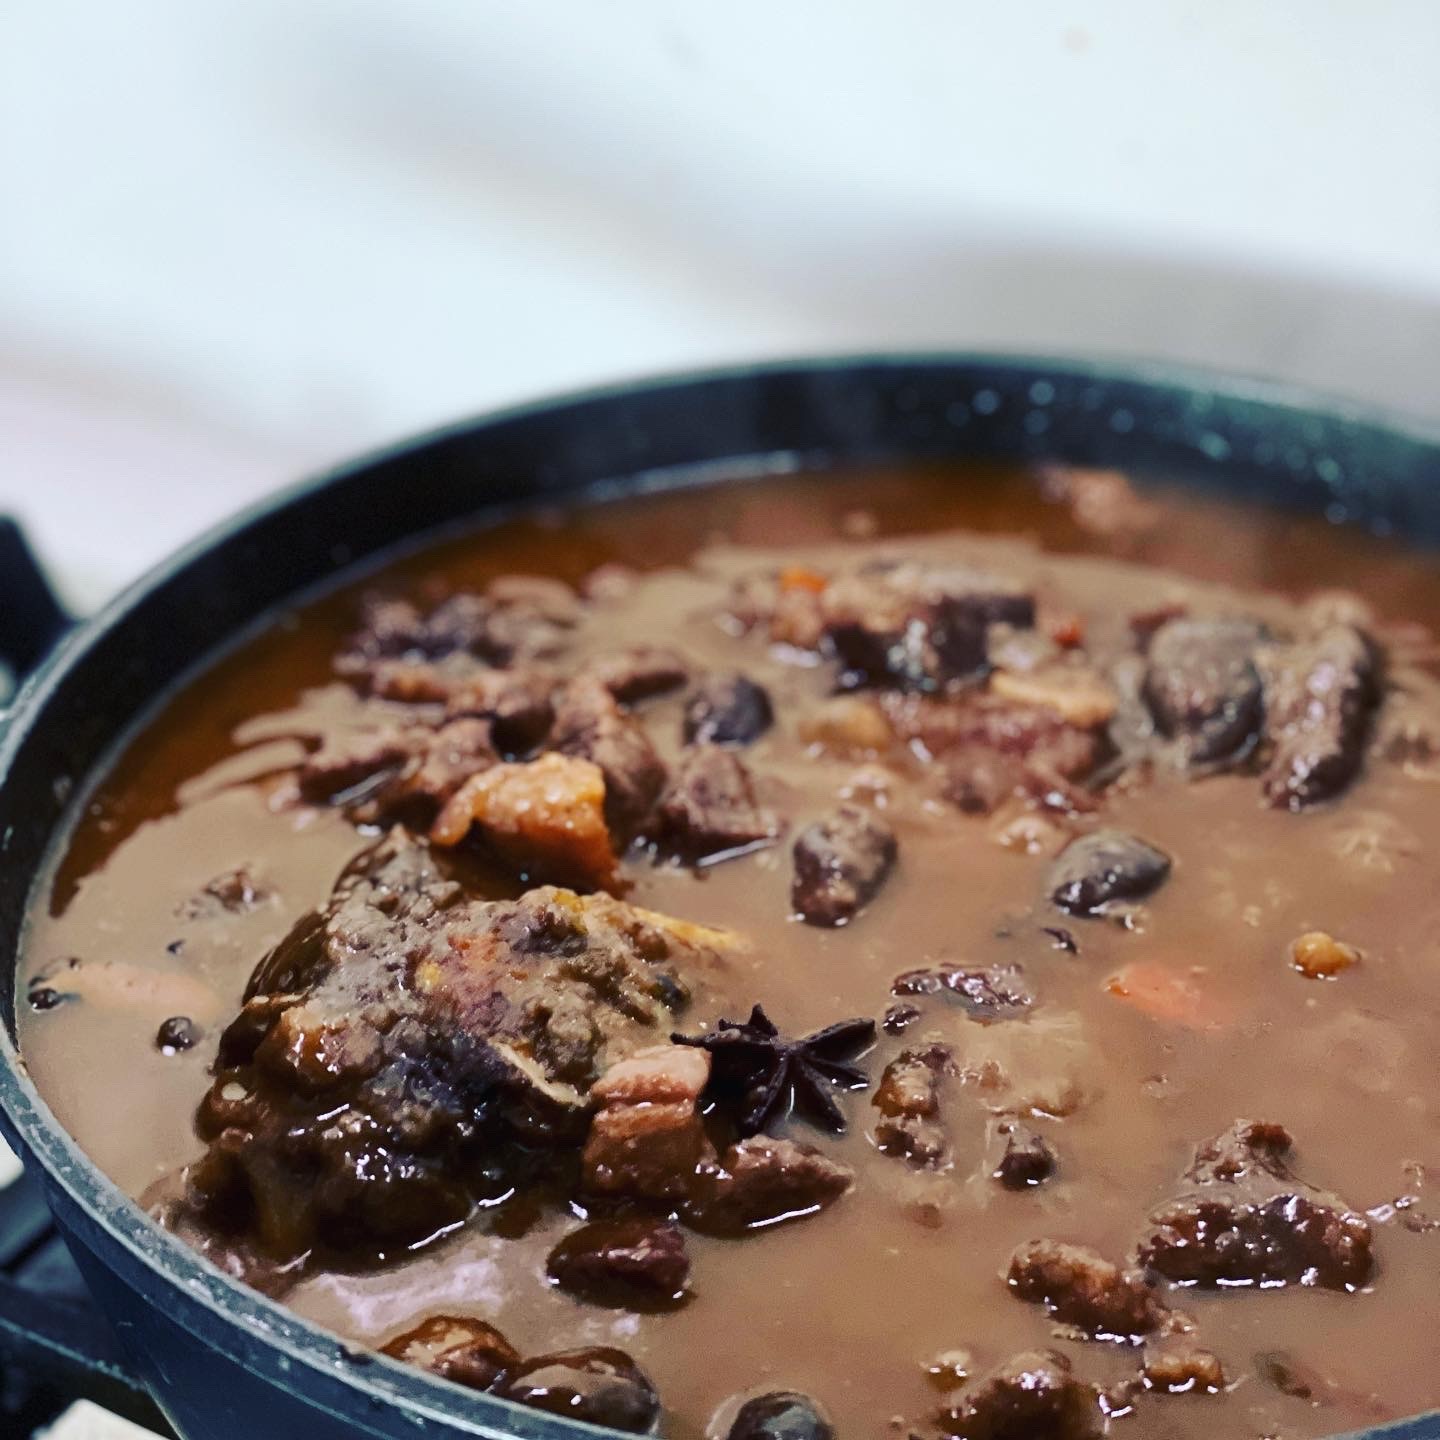


7.       Preheat oven to 180C

8.       We used a lasagna dish for this family of big eaters. Using two sheets of short crust pastry that have been thawed. You’ll find there will be a bit of overlap in the middle so cut this section out and add to the short sides. Line a sheet of baking paper on top of the pastry, add ceramic baking beads on top and bake for 20 mins. Once this is done, take the baking sheet and ceramic baking beads out and place pastry back in the oven for another 5 mins until the base is a light golden colour. (This will give the base that lovely crisp crunch.)

9.       Fill the pie with cooled meat filling.

10.   Brush edges of the cook short crust pastry with egg before applying the puff pastry (for a delicious flaky golden topping) on top. You will note overlap again, cut the section out and make interesting shapes to apply on top of the lids. Apply eggwash on lids and cut out pieces. Make 4 little incisions with a small knife before placing back into the oven to bake for 30mins.

11.   Devour whilst the pie is hot and fresh topped with tomato sauce with a side of peas and blanched beans. 


Hot tip

Keep left over meat mixture to make mini meat pies later on.

Any left over pie can be reheated in the oven at 180C for 15 mins. 


Sunday, August 9, 2015

Huon salmon tacos

I've been meaning to replicate an amazing dish "Ocean Trout tacos" that I had tried at Big Stone. I had wondered how they made the taco shell which was so crunchy and delicious combined with the rice and sashimi grade ocean trout was a taste explosion I wanted to have all over again.

Whilst making deep fried dumplings for the kids a few nights ago, I realised the tacos were made from egg wonton wrappers. With this in mind, I was determined to make this dish. Heading down to the Sydney Fish Market, I found that the deboned, skinless Huon salmon was on special and spotting the Huon Salmon caviar on the shelf would add to that extravagance for this dish.

I loved this dish and so did the kidlets. These were so good and being eaten as fast as I could make them. A delicious tasty dish that I will certainly be making again soon.


Makes 24 tacos
 

Ingredients


Rice
1 cup of cooked rice (day old rice works a treat)
1 tsp sesame oil
Pinch of salt

400g deboned and skinless Huon salmon, cut into small cubes
Garnish with spring onion thinly sliced
Tasmanian Huon salmon caviar 50g

Egg wonton wrappers
Canola oil

Sauce
1 tbs rice vinegar
1 tbs light soy sauce
1 tbs mirin 
2 tsp grated ginger


Method


1. Prepare rice by mixing with sesame oil and salt. Roll into long 5cm long logs and set aside.

2. Prepare the salmon, cutting into thin half centimetre slices and then into small cubes. Set aside in a bowl.

3. Make the sauce by combining all the ingredients of vinegar, soy sauce, mirin and grated ginger.

4. Place 2 cups of oil into a wok and place on medium high. (Pointing a wooden chopstick to the base of the heated oil in the wok, when the bubbles rise instantly, you know when it is ready).

5. Place 4 wonton wrappers into the hot oil. As these cooking away, place the tongs in the centre to create a slight depression to give a bowl like appearance. This will be handy when putting the tacos together.

6. Place the cooked wonton wrappers on a plate and add the rolled rice logs.

7. Place a good amount of Huon salmon on top of the rice.

8. Garnish with thinly sliced spring onion and salmon caviar.

9. Sprinkle a teaspoon of sauce on top just before serving.


Handy Hints

What to do with leftover rice?
With the leftover rice, I use sandwich bags and fill this to a handful size to place into the freezer and have rice ready to use at a moment's notice.

Place the unwrapped frozen rice into a bowl in the microwave with a dash of water and place on high heat for 3 minutes to get lovely soft rice instantly.

Ingredients sourced from?
You can find Tasmanian Huon salmon caviar 100g for $15 at De Costi, Sydney Fish Markets.
You can also use Ocean Trout fillets or Huon salmon deboned and skinless.


Sunday, June 21, 2015

Spaghetti Bolognese you want to make a big batch of.

I've been looking for a Bolognese sauce to impress hubby and have been playing around with a few things but I will say that I am most impressed with Matt Preston's Simple Bolognese recipe. So much so that I have made this twice already and haven't had the need to change the quantities and now have an easy method to make this. This recipe makes a good amount, as I have 3 containers in the freezer ready for the next spag bol night. Perfect for a cold winter's night and one that hubby and the kids' love.


Matt's simple bolognese

Serves 4-6

Preparation time: 15 minutes

Cooking time: 30 minutes or as long as possible

Ingredients

Olive oil
40g butter

To make soffritto
2 medium carrots, diced small
3 medium brown onions, diced small
4 bacon rashers cut into fingernail size tiles
2 celery sticks, diced small

1 tbsp soft brown sugar
4 cloves garlic, peeled, chopped and crushed
3 tbsp tomato paste

1kg beef mince
1 lemon
500ml red wine
3 bay leaves
Splash Worcestershire sauce
2 cans tinned tomatoes
500ml beef stock

1 large pack of egg tagliatelle  the curly nesty ones are nicest
150g Italian parmesan cheese
1 loaf crusty bread and a green salad for serving

Method


1. Place a large pot on the heat.

2.  Throw the onions, carrots, celery, bacon rashers into the food processor and blitz until diced small.

3. Pour in 2 tablespoons of olive oil and 40g butter into the hot pan. When the butter is melted and the oil hot, throw in the carrots, onion, celery and bacon. Cook until veg is soft and going translucent at the edges (about 10mins).

4. Sprinkle over 1 tbsp of brown sugar and stir through.

5. Add garlic and tomato paste. Move this all round the pan to cook out for three minutes.
Scrape the tomatoey soffritto into a bowl.

6. Splash in some more olive oil.  When it is hot, throw in the mince and cook until browned. Stir the meat the whole time so it cooks evenly. (Depending on the size of your pot, you may find it easier to do this in two batches.)

7. Cut a 4cm long ribbon of lemon peel (without pith) and cut the lemon in half.

8. Scrape meat into the soffritto bowl.

9. Turn up the heat and deglaze using the red wine.

10. When the wine has reduced by half, add back in meat, soffritto, bay leaves, a couple of good dashes of Worcestershire sauce, lemon peel, tomatoes and stock. Stir.

11. Season with salt and a good squeeze of lemon juice from one half of the lemon. Reserve the rest.

12. Bring to the boil covered, then remove lid and turn the heat right down. Cook very gently for up to four hours. Stir occasionally to ensure the sauce doesn't stick and burn. (If the sauce gets too thick, add some more stock and stir it in.)

13. The sauce is ready when it smells irresistible, wonderfully thick, and is a dark red, glossy colour.


14. Taste and season with a little more salt and lemon juice as required. You can now either serve it straight away or cool it and refrigerate before using the next day.

15. Cook the tagliatelle in plenty of salted boiling water in a large pan. When the pasta is cooked but still a little firm to the bite, carefully scoop out a cup of the starchy cooking liquid and drain the pasta.

16. Put a generous ladle of the bolognese sauce in the pasta pot (about two cups) and toss through the pasta. Moisten the combination with a little of the reserved pasta water so it isn't clumpy.

17. Feel free to use as little or as much sauce as you like  we've got lots of plans for the sauce that's left over.

18. Serve it with grated parmesan over the tagliatelle, bread for mopping up the leftover sauce and crisp green salad.


Thursday, February 26, 2015

Eggplant sang choy bow

The last few days of Frugal February are here and I even managed to get hubby onboard. He made a delicious fruit salad compote with no sugar which went perfectly with a few large spoonfuls of icecream that the kids and I devoured. 

Still in theme of Chinese New Year, I wanted something with eggplant as I've always eaten sang choy bow but have never attempted to try it. I always find that I would have this dish and be full before continuing on with the banquet at my fave Chinese Restaurant. I must say the result is pretty good and I made enough to have again the second night.


 Serves 4

Ingredients


1 iceberg lettuce

1 eggplant diced into 1cm cubes
1 cup of rice bran oil

2 tsp rice bran oil
3 shallots (white part only) finely sliced
2 tsp of freshly finely chopped ginger (typically a knob of ginger as big as your thumb)
1 red chilli sliced finely 
500g pork mince
2 tbsp hoisin sauce
1 tbsp sesame oil
1 tsp Szechuan pepper
227g can water chestnuts drained and chopped
2tbsp chopped coriander leaves

Method


1. Peel 8 lettuce leaves and trim if need be to make into large cups
2. Heat 1 cup of oil in a wok on high
3. Add eggplant pieces and cook for 4mins turning these over. Remove from oil then place onto paper towel lined plate.
3. Remove oil but retain 2 tsp of oil for the next part
4 Stir fry shallots, ginger and chili for 1-2 minutes
5. Add pork mince and cook for 5mins until colour changes
6. Add hoisin, szechuan pepper, soy sauce, sesame oil and water chestnuts.
7. Continue to stir fry for another 2-3 minutes
8. Transfer into a serving bowl and stir though the coriander
9. Arrange lettuce cups on a platter, spoon a little of the pork mix into each leaf and serve


Handy hints


Great to make big batches to have handy for quick meals.
My kids love this dish so much so we are fighting over the last spoonful of the eggplant mince mix

Sunday, February 8, 2015

My favourite fluffy ricotta pancakes

Pancakes are always great fun and on this particular Sunday, I thought I'd treat my family to my favourite breakfast of fluffy ricotta pancakes. The ricotta makes these pancakes moist served up with a dollop of my mango and lemon curd, its too good to say no.


Makes 8 to 10 pancakes


Ingredients

1 cup ricotta cheese
1 cup flour
1/2 teaspoon baking powder
1 1/2 tablespoons sugar
1/8 teaspoon salt
3/4 cup milk
2 eggs, separated into yolks and whites
1/2 teaspoon vanilla
zest of 1 lemon or orange just for that citrus zing


Method 

1. Add dry ingredients together flour, baking powder, sugar, and salt in a small bowl.

2. Combine wet ingredients of ricotta, milk, egg yolks, and vanilla in a separate, larger mixing bowl.

3. Add the dry ingredients to the wet, add the zest of orange or lemon, stirring gently until just combined. 

4. Beat the egg whites with a mixer until stiff.

5. Stir a small scoop of the egg whites into the pancake batter to lighten the batter, then fold in the remaining egg white with a spatula.

6. Heat a fry pan over medium-high heat. Melt a small bit of butter/or 1tbsp of olive oil in the pan, just enough to coat the surface.

7. Use a 1/4 cup measure to pour batter onto the fry pan. I usually try and fit at least 4 circles on the fry pan. Cook the pancakes for about 3 or 4 minutes, until the undersides are golden and you see a few bubbles popping through the pancakes. Flip the pancakes and cook another 2 to 3 minutes, until golden.

8. Repeat with the remaining pancakes.

9. Serve the pancakes immediately with maple syrup, jam or lemon and mango curd.


Handy hints

If you have a handheld mixer, it's very easy to beat the small amount of eggwhites. You don't even need mixer if you have some muscle nearby to whip the eggwhites for you. If you have a stand mixer, start on low speed and gradually increase to the highest speed as the whites start to form bubbles and thicken.

If your ricotta seems to have a lot of liquid, set it in a fine mesh strainer to drain off excess liquid about 30 minutes before you start cooking.

Saturday, January 31, 2015

Chicken with Ponzu dressing

I was feeling like I needed to make something Japanese probably due to the fact my other half is in Nozawa Onsen, Japan. The lucky duck is enjoying a skiing trip with the lads but not to worry I'm planning a shopping and eating trip to even the score.

With chicken thighs in the fridge, I thought this would be a quick and easy meal to make. Plus there's the added bonus that the kids love it too. The ponzu dressing is so easy and I love the citrus notes especially as limes are in season at the moment.


Serves 4

Ingredients

4-5 chicken thigh fillets (it's up to you whether you select with skin or without, I like it as either version)
salt
pepper
2 tbs of olive oil (or whatever cooking oil you have)

Ponzu dressing
Juice of 1 lime
Juice of 1/2 lemon
100mL mirin
60mL light soy sauce

To serve
Finely sliced spring onions
Finely sliced red chilli
Rice

Method

1. Make the ponzu dressing first, add the lime, lemon juice, mirin, soy and stir well.
2. Season chicken thighs well with salt and freshly ground black pepper.
3. Heat the oil in a frying pan over high heat.
4. Add chicken (if you use with skin, then skin side first) and cook for 3-4 minutes (or until skin is golden and crispy).
5. Turn chicken over, and cook for another 3-5 minutes until chicken is cooked through.
6. Slice the chicken and arrange on serving plate.
7. Drizzle ponzu dressing, sprinkle the sliced chicken with spring onion and chilli.
8. Serve with rice.

Handy hints

If you like crispy skin then I recommend that you put a smaller pan on top of the chicken to weigh it down which will help with that.


Thursday, January 22, 2015

Kale cashew pesto


With an excess of kale in the fridge, the kids had already indulged in kale chips, the idea of kale pesto was the next step. Kale contains high levels of iron and calcium, it's also high in Vitamin K which helps prevent cancer and Alzheimer's; Vitamin A for vision and skin; and Vitamin C for your immune system and metabolism. What person wouldn't be eating this super food in it's own right.

I do love the classic flavour of basil in pesto and using a combination of both basil and kale means you still get that beautiful basil flavour, with all the nutritional benefits of the kale. You'll find that the pesto tastes so fresh and after a day in the fridge, it doesn't turn that dull colour when you make the usual basil pesto.
 
What's so great about this recipe is that you can mix and match the ingredients so easily. Don't like basil? Try parsley, coriander or spring onions. Run out of kale? Use spinach, rocket, or even silver beet leaves instead. Let me know what other combinations you come up with.


Ingredients

1 handful basil
1 large handful kale leaves (~4 leaves, pull them off the stalks)
1/2 cup of roasted unsalted cashew nuts
1/4 cup of good olive oil
1/2 lemon juice and zest
2 cloves of garlic
1 tsp salt

Method

  1. Blend all ingredients in a food processor until well combined but still with some texture.
  2. Serve straight away.
This pesto will last around 3-4 days in the fridge. You can also freeze it, if you don't plan to use it all in one go.This recipe also easily doubles or triples for a larger crowd.


Handy meals with pesto

Pesto on toast
If short on time, this pesto is the best snack. Toast up a slice of bread and slather the pesto on top. Yum yum!

Pesto macaroni for the kids
Cook up some macaroni, add a generous dollop of the kale cashew pesto and mix through until warmed. The kids will devour this delicious meal, my munchkins loved it.


Spaghetti with prawn & pesto
An adult version is to cook up some spaghetti, fry up some chilli and prawn (frozen or green prawns work fine) and add this to the spaghetti with a generous dollop of kale cashew pesto. Mix through until warmed and served up with freshly cracked pepper on top. Yum.